New Fuel Injector for the Z
by Chris on Aug.14, 2012, under Main Page
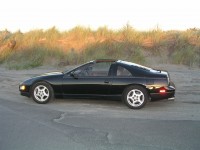 Quite some time ago, almost a year ago actually, a fuel injector went out on my Z. I looked into replacing it then, but according to the instructions in the manual it was going to be a very big job. You have to pull the Air Plenum off to get at the fuel injectors and that was something like a 10 hour job and pretty much required pulling the whole top end of the engine off, which I was a little apprehensive about doing. The car was still drivable, but it performed horribly and sounded worse, so I didn’t really drive it and I never did the repair either.
That all changed a couple of weekends ago. Read through for the blow by blow.
Now that it is summer time and I really want to drive the car again, I decided to tackle the job. However, I did some additional reading over the spring and I discovered that you don’t actually HAVE to remove the Plenum to get at the fuel injectors. The only reason that step is required is because the the plenum is manufactured with a bunch of unnecessary aluminum that overhangs the screw that holds down the injector cap. I read a number of posts by people who had simply used a Dremel tool with a carbide bit to grind down that excess aluminum and give access to the screw, thus saving hours of labor and avoiding the likelihood of breaking a number of connectors which have become brittle over the last 20 years of driving.
I gave it a go over the weekend, and it worked amazingly well, once I got past the nervousness of grinding away parts of my engine. Before I started grinding, I used my voltometer to ohm test each injector so I knew which one was bad. The spec is 10-14 ohms. #1 and #3 came in just shy at 9.8 and 9.9 respectively which didn’t seem that bad, #5 and #2 were perfect at 12, and #6 was little out of spec at 16. At first I thought that might be my problem, but then #4 registered at 30,000 ohms, so I felt sure that was the culprit.
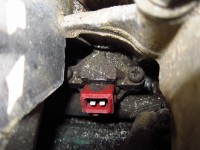
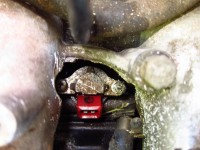
About three minutes into the job my Dremel tool smoked and died, but Ann was nice enough to lend me hers, and with the addition of the nifty flexible attachment, I was off and running. You can see here how much material I needed to remove to gain access to the screw.
Nissan used some soft ass Phillips head screws instead of real, hex head bolts to hold down the cap, so after I got done grinding I still had a problem in that the screw heads were stripping out instead of breaking loose. To solve that problem, I bought a pair of locking bent nose pliers, which arrived Monday. I soaked the screws with PB Blaster (which is a fantastic product for loosening stubborn bolts) and went after them with the pliers, and bingo bango bongo, they came right out! I will be replacing them with allen bolts to avoid this problem in the future.
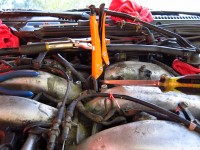
Next came the issue of removing the injector itself. According my reading, sometimes these injectors will literally fly out like a bullet if the fuel system is still pressurized (which mine was not), but I really don’t see how that could be possible. I had to work like a demon to get mine out, and I had to create this rather unorthodox looking tool to finally accomplish my goal.
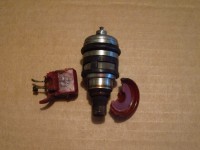
I had one pair of locking pliers on the pintle mount of the injector, another pair of locking pliers around the handles of the first set to keep them from popping open, and then a big ol’ screwdriver to act as a lever. Archimedes said with a big enough lever he could move the world, but I’m not sure the world is as stubborn as this little injector was. Even with my little contraption it still took several attempts and a liberal dosage of salty language to get the thing out. But it did finally come out (although it was a little worse for the wear).
Replacing the new injector was a lot easier than getting it out. I lubed up the seal ring with a little Vasoline to aid the installation, and used a screwdriver and hammer to gently tap it into place. Reinstalling the fuel rail, balance tube and other bits was easy enough, and then it was time to fire it up see how the car ran.
I was very excited to turn the key, but when I did, I was highly disappointed to discover that the car was still down a cylinder and running like crap. I revved the engine a few times, and it smoothed out for a minute but quickly went back to being unbalanced. I took it for a quick drive to see if it would work itself out, but naturally it did not. When I got back to the house I thought about it for a while, and then I reseated the injector connections on both #4 and #6. #6 slipped off surprisingly easily, and when I reseated it the connector slid on and seated much better.
I fired up the car again, and viola! All fixed!
August 14th, 2012 on 11:42 pm
so glad the Z is up and running. So happy for you. The picture is from Cape Disappointment, Waikiki Beach area. Can’t remember exactly what day it was though. It sure is cute.